
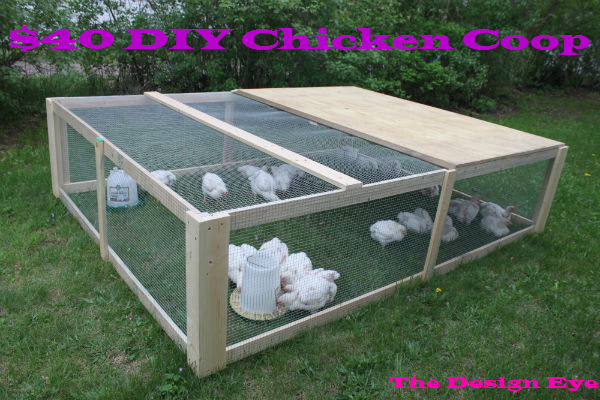
We are having quite an adventure with our meat chickens. They are already 4 weeks old and only have a couple weeks to go. They are growing fast and running out of room in their brooder. Thankfully, it has been beautiful out and they can start living outside. I drew up some plans for a coop that is quite simple. It consists of 4 corners, 4 panels, and a top made of hardware cloth and plywood. The coop is 2’x6’x8′ and fits 25 chickens.
Materials:
40′ of 1/2″ Hardware Cloth
Staples
Screws
3 – 1×4
1 – 2×2
8 – 1×3
Plywood – 4′ x 6′
The corners are 24 inches high and made of 1x4s and 2x2s. 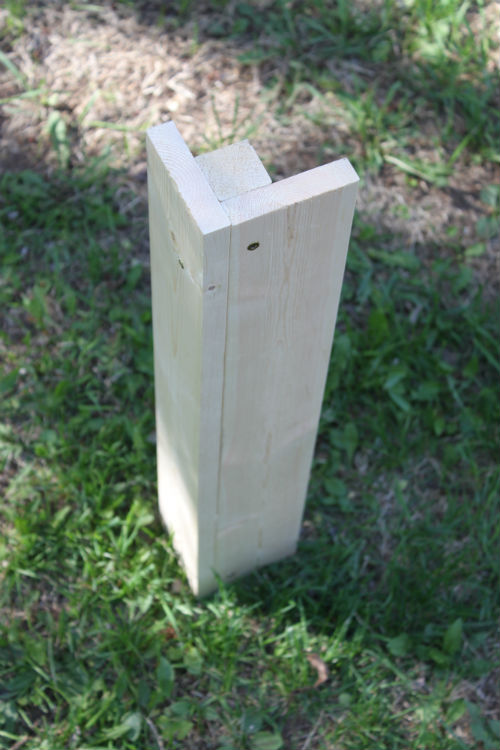
Next, we made the sides panels out of 1x3s and hardware cloth. The long side is 8′ and the short side is 6′. We spaced out the 1x3s 24 inches apart and stapled on the hardware cloth. The hardware cloth is stapled on the outside.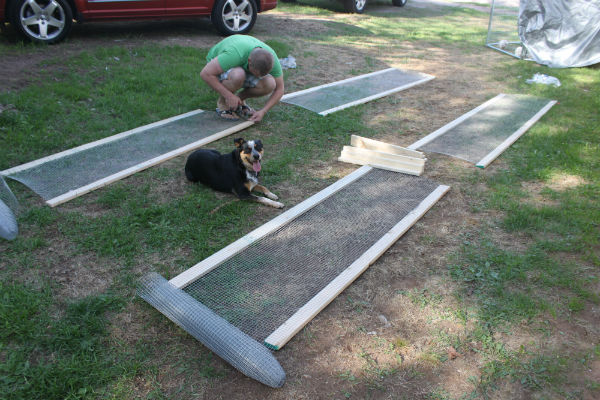
With the scraps cut off from the 1x3s on the 6′ side we added support on each panel.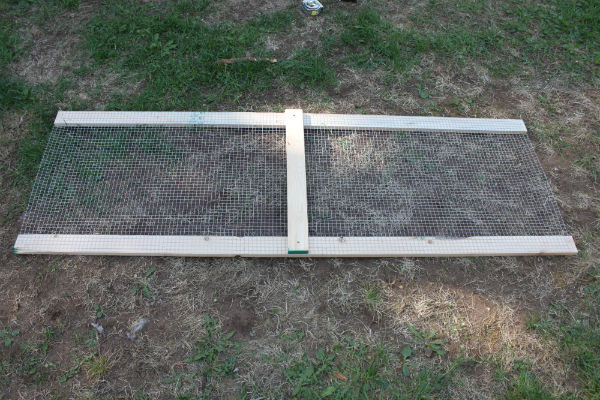
The panels tuck inside the corner pieces to help secure the hardware cloth. We don’t want our chicks getting eaten by anything but us!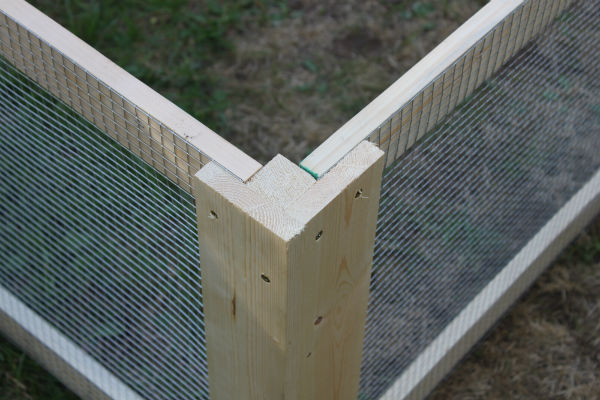
We put in a lot of staples to secure everything in place and ended up with our base.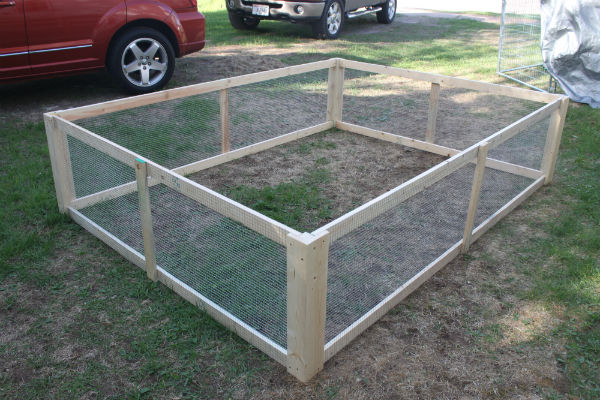
We used a 1×4 to secure 2 6′ sections of hardware cloth to cover 1/2 of the top. The other 1/2 is covered by a 4’x6′ piece of plywood.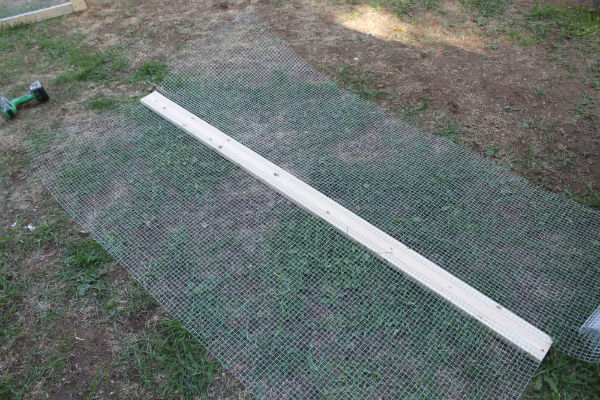
Ryan climbed in a secured the last bit of hardware cloth.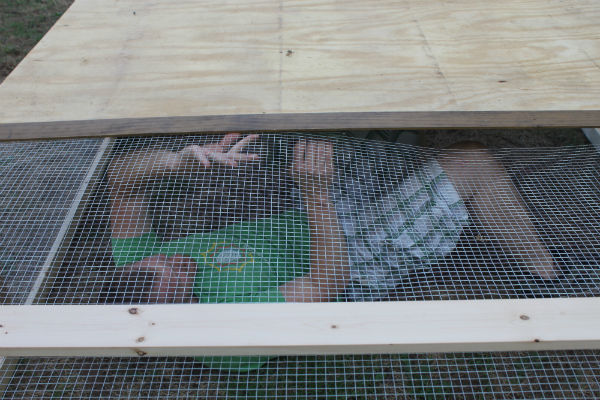
After just a couple of hours we have a great looking coop.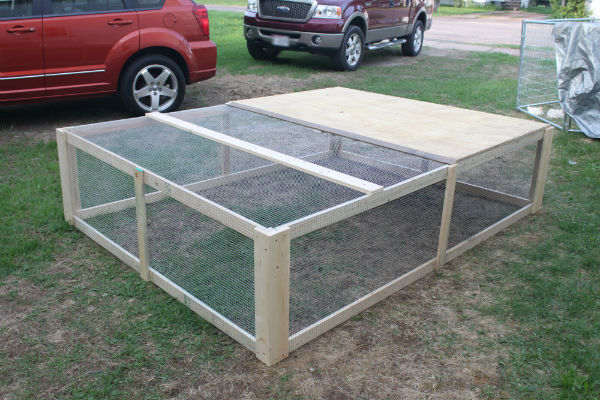
The best part of the coop is that we can move it around the yard so that the chickens don’t get too stinky and our new neighbors won’t hate us. For now, the coop is fully stocked and the chickens seem happier than ever.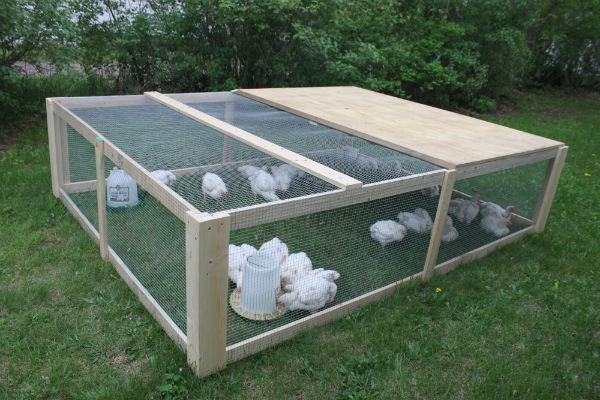


20 responses to “$40 DIY Chicken Coop”
That looks great. You’ll make it sound and look so simple. I split mine up into 2 cages with 5 per cage. Not as lucky as yours. lol. Mine will be ready to butcher in a week or two also.
This is fantastic! THANK YOU for sharing what you did! My meat birds are growing fast, and won’t be in the brooder for long. This is just perfect. It will also work to give my bunnies a safe play place. THANKS!
Wonderful!!! This so blesses me!! Thank you for sharing, this could also be slightly modified to cover a garden box to protect from pests, coons, deer,etc!! I’ve been working on this and almost gave up hope until I stumbled across your example! I’m not mechanically inclined or handy but this makes it do-able!! Thank you again! Signed dumb frustrated working mom now relieved and encouraged 🙂
looking for chicken tractor ideas – how did this end up holding up for you? would you recommend? any changes?
thanks!
It worked great! We plan to use it again for meat chickens this summer. You could easily attach wheels on the heavy end. We put our lawn mower under it to move it, but that isn’t ideal. The structure held up very well.
Thank you for sharing valuable information. Nice post. I enjoyed reading this post. The whole blog is very nice, I found some good stuff and good information about birds. Really you are quite an adventure with meat chickens. I impressed to see your idea. I will also use it.
Very nice and neat job there! Could work good for allowing hens to free range with out the worry of predators.
I just purchased the materials for this “$40” coop, and it cost me $100.
I definitely agree that this coop cannot be made for $40 unless you already own all the supplies. The hardware cloth alone would cost more than that (not to mention all the lumber and screws/nails). I finished mine yesterday and stopped calculating the exact cost after my third trip to the store. I did place wheels on one side to help with moving it. I like the design and hope it will work well for giving my chickens a little extra room to scratch and explore.
A chicken coop should be clean every two to three weeks and the litter shifted every day, like a cat’s litter box. A coop should be locked at night with all the chickens inside of it so that the chickens are protected from predators. The purpose of a chicken coop is to protect chicken from bad weather – hot, cold, wind and rain. In areas where the climate requires a chicken coop.
No doors? how did you access the food/water/chickens? no handles or wheels? how did you move this thing around? i love how you did the corners, though. and how you attached the sides to the corners. I’m using this idea to build ours.
To access the food and water we can easily lift one end of the coop. This isn’t ideal if you have large predators in your area, but we live in town and only worry about weasels and such. We later added some recycled wheels and a handle to move the tractor around the yard more easily. You can see the details here: http://www.the-design-eye.com/2014/07/chicken-tractor-modification/
I love your plans for this coop and I’m planning on building one today. My only question is the size. Did you find that 6’X8′ was large enough for 25 birds? That’s how many I’ll be raising this year and it seemed that this coop might be a bit small. Thanks.
For Cornish X chickens we have found this to be plenty of space. The chickens don’t ever move far from the feeder anyways. I would definitely move it often to keep them moving a bit and keep the ground beneath them clean. We try to move them once every 2 days. Good luck!
[…] the materials, and I’d drawn up plans before we even ordered the chicks. I based my design off this post, but it was important to me that the chickens have a fully-enclosed area, so we covered half of it […]
What did you use to secure the plywood on top without splitting the wood? (Size of screws/nails)And did you pre-drill holes for the screws?
We used 1.5″ self tapping wood screws. You could use other 1.5-2″ screws but I would recommend predrilling if they are not self tapping.
Has any one added a hinged top to this? For easy access to food water. I was thinking of putting some kind of mesh floor on mine for a run for my baby layers when they get a little older.
Would 40 Cornish rock chickens fit in this comfortably?
I probably wouldn’t put many more than 30 in here. We typically raise 25 at a time and they fit comfortably, but I think 40 might be a bit much.